Putting up spring’s surplus: Pickled Eggs

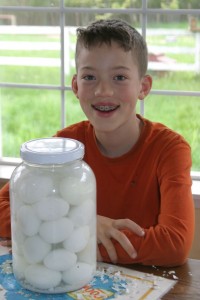
Step 1: Samuel has peeled a jar of eggs and put them into a salt brine

If there is one thing from spring that I want to stretch across the whole year, it’s eggs.  We get a ton of them each spring, and they are just beautiful.  The birds love spring’s fresh pasture, and the beta-carotene in grass-fed eggs makes the yokes a thick and rich dark orange.  The problem is sometimes there are just too many to eat them all. 

Last year we sold some to friends–our rate is $5/dozen for no-soy, no-corn, pastured duck eggs.  That is enough to reimburse the feed costs, and give a pittance for labor, but I would rather keep the food “in house” if possible.  

The solution: pickled eggs!  Last year I experimented with a couple different recipes and learned that they are an excellent addition to salads, and they keep wonderfully–the last egg was eaten in January, and was just a good as the first one we pulled out in May. 

I’ve looked at many recipes, and they are all very similar:  Add vinegar, add spices, add eggs, put in the refrigerator, then come back in 3 weeks. 

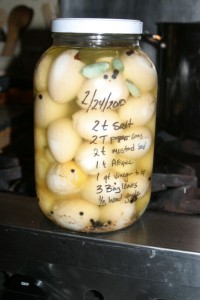
Step 2: replace salt brine w/vinegar & spices

The one that I like to use is taken from “The Encyclopedia of Country Living”by Carla Emery.  It’s called “Spicy Pickled Eggs”.

Step 1: brine eggs in a saturated salt solution for 2 days. 

1 cup salt to 1 quart water
2 days in refrigerator

Step 2: Remove salt brine, add pickling spices, and top up with vinegar.

2 T black peppercorns
1 T whole coriander seed
2 t whole mustard seed
1 t whole allspice
3 bay leaves
1/3 head garlic cloves
apple cider vinegar to top off jar (~1 quart)
refrigerate

Joel and Ruth especially love these–they’ve tapped into the first jar already!

Posted in Farming, Food Preservation, Pastured Poultry | Tagged , | Comments Off on Putting up spring’s surplus: Pickled Eggs

New addition: The family cow

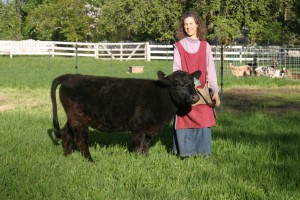
Maureen, a Dexter, is a bred heifer who will calve in June.

We’ve finally made the jump to having a (relatively) large farm animal.  On April 26th, Maureen the cow, and Pete, a companion steer, arrived at our place.

Kathy has been cow-shopping for more than a year, and it didn’t take long to conclude that Dexters were the right breed for our place.  Even a “small” Jersey cow is a lot of animal, and there were several farmers who commented on how healthy and intelligent their Dexters were when compared to others they have had.  Newman Turner’s books specifically mention Dexters as a good breed for farms with poor soil.

Dexters are not miniatures, but they are still quite small–less than 600 lbs.  The top of Maureen’s head is a couple inches below my shoulder, but she still is a whole lot bigger than our goats!

Girls with silly-putty say: "Cow for Butter, Steer for Meat"

The more difficult criteria was finding one which had been handled enough to be comfortable & gentle around people AND was in good condition.  It seems that either they have good, grass-fed constitution but are wild because they never get handled, or they are well handled & gentle but have the sway-backed, weak ankled signs of a poor grain-fed animal.  Maureen came from a farm in Lake Stevens, WA from a woman who needed to reduce her herd size.  However, Maureen wasn’t for sale until Kathy explained her goals of finding a gentle, grass-fed milk cow for a family with 4 young kids (who happened to be along that day), and specifically asked if a bred heifer was available.  The owner had another cow in mind for us, but decided that we’d love Maureen enough to let her come our way.

God certainly helped things fall together for us!

Posted in Cows, Farming | Tagged , , | Comments Off on New addition: The family cow

Feeding bees honey, not sugar syrup

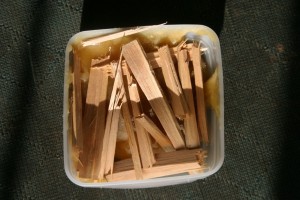
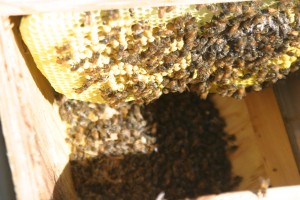
Small sticks keep the bees from getting stuck in the raw honey

I have a strong opinion the best food for bees is the honey and pollen they have collected themselves–I’m reluctant to feed my bees sugar. 

The standard approach for feeding bees is to use sugar syrup, or high fructose corn syrup (HFCS), and although these will keep the bees alive it’s a destructive practice.  I think there are better options. 

The best solution is to put in a spare frame of honey from another hive, but this is my only top bar hive and I don’t have any surplus frames of honey.   

Several beekeepers talk about making honey syrup by adding water, but it quickly ferments and spoils.  There is also some discussion about feeding liquid honey, but there are problems with bees getting stuck and drowning in the sticky liquid. 

Fortunately there is still some empty space in front of the hive, and I could fit in a pint of honey covered with sticks.  The twigs give the bees a place to stand without getting stuck, and I used the thickest, most crystalized honey I had to prevent the “drowning” factor. 

It will take a few days before the bees move all the honey into the comb themselves–the observation window is a very useful to monitor their progress.  When its empty, I’ll refill the tub and repeat the process.  This way they will store the honey in the comb, and I’ll be able to remove the feeder dish before it’s in the way.

Posted in Beekeeping, Top Bar Hives | Tagged , | Comments Off on Feeding bees honey, not sugar syrup

Trouble in the Top Bar

Starving bees

The last 2 weeks have been cold & rainy, and I’ve been worried about the new package I installed on April 10th.  When I last checked them 2 weeks ago, the weather was good, and they were bringing in lots of nectar and pollen.  I was so confident that I stopped feeding them, and that was a mistake.

The weather on Wednesday, May 5th was horrible, and I think this was the day that was the worst on my hive.  Most of the day had rain mixed with sleet, and the temperature was hovering around 35 F.  Thursday was much better and bees from my other hives were out flying again, but I didn’t get home until late evening.  Friday I was home and I checked on my top bar hive as soon as the sun was on it, and I immediately put in a jar of syrup–the bees were starving.  At least half of the bees had died in the cold.  The stores they had brought in were enough to bridge a length of bad weather, but 12 days was too long for them.  I did find the queen and she is still alive, but was lethargic like the rest of the hive.  By the afternoon, they were scurrying around on the comb, but not flying yet.

The main alpha hive is doing fine–I left them with enough honey frames to make it through the bad weather.  I knocked on the front door of the bravo and charlie nucleus hives, and lots of guard bees came out to greet me.  I didn’t open that box because the queens will be mating this week, and I did not want to disturb them.

The observation hive also is doing well, except for the top frame behind the glass.  That frame gets easily chilled, and does not get the same service from returning foragers as the bottom 5 frames.  That top frame also had about a hundred drones emerge last week, and they were stuck behind the queen excluder.  Because I need drones this week, I removed the top, and shook them down into the main box so they could get outside. I was not able to find the virgin queen that I had watched emerge, but they often are able to squeeze through an excluder (so I’ve heard).

My disappointment has been tempered some by the success of the nucleus hives–they are going better than I expected.   Unfortunately the major hit my top bar hive has taken is due to my own mistake of removing the feed too soon from them.

Posted in Beekeeping, Top Bar Hives | Tagged , | Comments Off on Trouble in the Top Bar

Homemade goat’s milk kefir; the “Champagne of Milk”

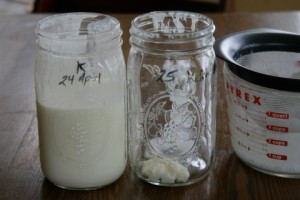
Strained kefir, and kefir grains ready for today's milk

Here is another winner in our routine–Kefir

It’s similar to yogurt in flavor, with a little bit different zest to it.  Kathy and I drink it plain for breakfast, and it is also very good with frozen blueberries.  It makes an excellent complement to soups, especially borscht. 

We use kefir grains as our starter culture, which we originally received from a friend.  We’ve kept this particular set of grains alive and going for more than 2 years now, and we’re very happy with them.  There are other cultures out there that do not use grains, but they cannot be propagated between batches, and you need to purchase more as you use up your culture packages. 

The basic recipe uses about a quarter cup of kefir grains to a quart of milk.  Cover the jar, and put it in the cupboard (or another dark place) at room temperature for a day.  When it is finished, the milk will have thickened but not curdled.   Filter the grains out of the cultured milk (kefir) with a strainer before drinking it.  Put the jar of kefir into the refrigerator, and add the grains into your next batch of milk to repeat the process.  Sometimes we rinse the grains under cold water before adding them to the next batch of milk, but that isn’t a necessary step. 

We are fortunate enough to have goats, and when the warm milk comes into the house, it is immediately added to the kefir grains.  The freshly strained kefir is very good!  

The grains are a complex combination of bacteria and yeast, and vary in size from tiny rice sized bits to large inch-wide chinks.  They are translucent white, and quite firm–almost rubbery.  They increase by about a third with every batch, so after a while you may have more than you need.  In our house, that means we offer them up to the kids, who come running to eat them.  The grains taste like kefir (surprise!), and just have a different texture.  Like the kefir itself, the grains are also an excellent pro-biotic. 

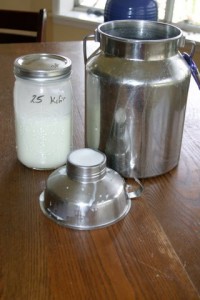
Fresh goat's milk is immediately added to the kefir grains.

More grains will make the milk curdle faster, as will warmer weather.  This will happen to you sometime, but don’t despair.  Filter out the curds for kefir cheese, and keep the whey in the refrigerator–it’s a useful ingredient in many recipes. 

If you don’t need them working every day, the grains can be kept happy for several weeks by putting them in some cold milk in the refrigerator.  The cold slows them down, and the milk keeps them fed. 

It originated in the middle east, and I first heard of it from another student in a cheese-making class as “too good for infidels”.  I agree with that description now, but I’d rather call it the “champagne of milk”.

Posted in Food & good eating | Tagged , , | Comments Off on Homemade goat’s milk kefir; the “Champagne of Milk”

Queens emerge as early as 10 days after the hive is split

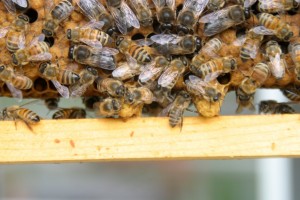
Capped queen cells; A new queen will emerge 16 days after the egg is laid.

I checked my hives 7 days after making splits into 4 frame nucleus hives, and was pleased to see the bees doing what they ought to be doing–making queens.

I should not have been surprised to see capped queen cells after only 1 week, but I had made a math error.  The new virgin queen will emerge at day 16, counting from when the egg is laid.  BUT, it takes 3 1/2 days for an egg to hatch into a larva…AND all new larvae are fed royal jelly for 3 days.  At day 6 1/2, if a worker larva continues to receive royal jelly, she will grow into a queen.  I had forgotten about these 6 1/2 days when I made the split, and was surprised when I saw capped queen cells after only 7 days of the nucs being queenless.
As usual, these worker bees did the best things given the circumstance, and chose the most mature larva possible to raise a new queen.  Good for them!
I moved one of the frames with a capped queen cell into to the top of my Ulster observation hive and checked frequently for when she emerged.  She came out 11 days after the split. 
That means that my nucs will have mated, laying queens 7 days earlier than I expected.  That’s great news!
Posted in Beekeeping | Tagged , , | Comments Off on Queens emerge as early as 10 days after the hive is split

Compost grown radishes

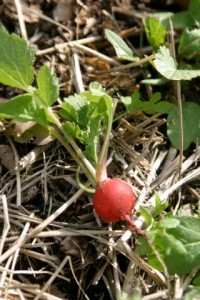
A young radish flourishes in compost

This spring we made a major shift in our approach to gardening, and replaced our front lawn with beds for the garden.  Our front yard now has a collection of 5′ x 10′ beds with various vegetables coming up. 

After laying out the wood border for the bed, I spread out a layer of cardboard as a barrier to smother the grass of the old lawn.  On top of the cardboard went a 3 inch deep layer of mostly composted horse manure from a person about a mile down the road from us.  The manure was about 6 months old, and was a deep brown color with some red composting worms living in it.  Dave warned me about putting his unfinished compost in the garden–that it may not let anything grow at first–but I decided to take that risk and I used in anyway. 
 
The grass from the lawn has not come through the new beds, and you should see the radishes!  Until this year, I’ve always had problems with getting a decent radish to grow for me, but this spring they are beautiful.  Samuel and I went out last week to thin them and we came back with a handful of dime-sized bulbs that were sweet and juicy.  They barely have the first couple of leaves out and are already nice and round.  This is going to be a great garden year!
 
The King Conservation District has a list of farms with free manure available.  Most of these are horse owners who are glad to have someone come and haul it away for them.  I took 4 pickup loads from the horse owner down the road, and Dave even loaded my pickup with his tractor.  I’ll be visiting him more as time allows this spring! 
Posted in Farming, Gardening | Tagged , , | Comments Off on Compost grown radishes

Lacto-fermented ginger ale

Here is another one of our favorites from Sally Fallon’s Nourishing Traditions cookbook (page 586).

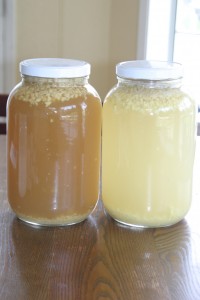
This Ginger Ale is ready to bottle; 1 jar made w/Rapadura, 1 jar w/sugar

3/4 cup ginger (chopped in food processor)
1/2 cup fresh lime juice
1/4 cup rapadura
2 teaspoons sea salt
1/4 cup whey
2 quarts water

I’ve changed the process a bit from the recipe in the book because I like it when it’s really fizzy.

To start with, I don’t take the time to peel the fresh ginger.  As long as the root is fresh and in good shape, I think this works fine.  After all the other ingredients are in, I fill my jar about half full of water and stir so the salt and Rapadura dissolve.  To speed the fermentation along, I add the yeasty dregs of a bottle from my previous batch.  At this point, I cover with a lid, and place the jar in room temperature on a plate to catch any overflowing drips.  If I don’t have any ginger ale left from before, I leave the jar covered with a cloth so the wild yeasts in the air can start working in the mixture.  After about 8-12 hours at room temperature (longer if you are relying on airborne yeast), you should see the ginger pieces visibly churning in the liquid, with a large portion floating on the top.  When that happens, it tells me it’s time to bottle.

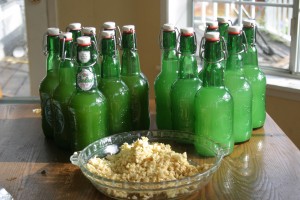
Bottled Ginger Ale & spent chopped ginger

To bottle, I first filter out the ginger pieces by pouring the liquid through a sieve into another jar.  It’s much easier to pour into beer bottles AFTER the pieces have been pulled out.  I immediately seal the bottles, but leave them on the counter for another 2-3 hours to let the bottles get charged with carbonation. I like using flip-top bottles because I can pop one open to check the pressure and seal it back up again without having to replace a bottle cap.

It is very important to get the bottles into the refrigerator at the right time, because you don’t want it too carbonated.  Getting them cold stops the yeast from working more, and gives you more forgiveness when you open the bottles later on.  Joel (then age 4) has a story of getting doused with half a bottle of ginger ale when he happened to be next to someone who opened a warm bottle of it on New Year’s eve.

The brew has a good strong ginger bite to it, and I really enjoy a glass before meals.  The bubbles are fun, the taste is great, and the ginger & enzymes help get the  digestive juices going!

Posted in Food & good eating | Comments Off on Lacto-fermented ginger ale

Delicious Kombucha

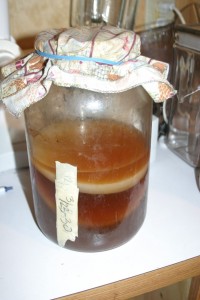
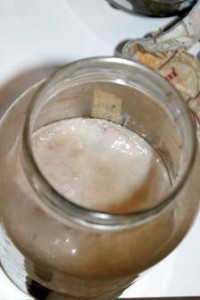
Gunther Frank writes in his Kombucha book that the containers shouldn’t be washed between batches.

All of us love this stuff. 

It’s full of B-complex vitamin, is slightly fizzy, and has a refreshing bite to it when it is done well.  It usually goes pretty fast, so I make about 2 gallons at a time.  There are several recipes out there, but the basic one uses black tea and white sugar.  Here is what I do:

1 gallon of water
6 teabags of black tea (organic)
1 cup sugar (organic)
12 minutes

Bring the water to a boil and remove from heat.  Add the teabags, and cover the pot.  Steep for 12 minutes, and then remove the tea.  Add the sugar and stir—it will dissolve quickly.  Let it cool to below 100°F/38°C and add it to your fermenting container.

The kombucha “mushroom” or SCOBY (Symbiotic Culture Of Bacteria and Yeast) needs fresh air, so your container should have as much width at the depth of the liquid.  Since I use 1 gallon glass jars, it means that I only fill them half full.  The SCOBY can get pretty thick, and there’s also a cup or two of ripe kombucha in with it when I start.  That means it takes me 5 jars to ferment my 2 gallons of sweet tea.  I use cloth around the tops of the jars, held in place by rubber bands. 

Depending on how strong you like it, it takes 7-10 days until the kombucha is ready to drink, so I use a strip of masking tape on the jars to show when the batch was made, and when it should be ready to serve.

When time allows, I like to bottle it up after day 4.  It takes another week or more to finish that way because the bottle seals off the oxygen.  The result though is a refreshing carbonated drink that can travel easily without spilling.  Grolsch beer bottles work great for this–I picked several cases of used bottles after a couple weeks of watching www.craigslist.com

Same jar, 7 days later

A note about fluoride and tea:

The tea plant naturally concentrates fluoride from its environment. 

“Tea is very high in fluoride because tea leaves accumulate more fluoride (from pollution of soil and air) than any other edible plant.”  http://www.westonaprice.org/Fluoride-Worse-than-We-Thought.html

I strongly recommend using an organic source of black tea because fluoride is a component of many agricultural pesticides.  It gets sprayed on the plant, and then the tea plant extracts any overspray out of the soil and concentrates it into the leaves that you use.

Many parts of the country have fluoridated city water, so you might get to deal with the “double whammy” of steeping fluoride out of the teabag into the fluoridated tap water.  Our current solution is a quality de-ionizing water filter and organic black tea.

Posted in Fluoride info, Food & good eating | Comments Off on Delicious Kombucha

Grass fed candles

Friday’s experiment with tallow candles was the most successful yet! 

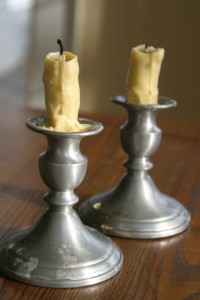
Candles with 1 part beeswax and 2 parts tallow


On my previous experiments, I’ve been pleased to learn that the tallow does not smoke, and it has almost no odor.  The problem I was running into though was that pure tallow has a very low melting point, and so the candles are soft, fragile, and the grease drips away from the flame much faster than it burns. 

I used stearic acid before to try to harden the candles up, and it did help.  The problem I had was that the final candle needed to be about 20% stearic acid and 80% tallow to get a decent wax out of it.  Stearic acid is extracted from palm kernel, and I’m happy to use it, but I don’t happen to have any palm trees growing on my place.  For the expense of it, I might as well buy candles instead of making them. 

Which made me think of my beehives.  I have my own (limited) supply of wax now, and mixing tallow with it seemed like a good way to harden the grease and stretch my beeswax into enough candles to matter.  So yesterday I gave it a try, and made a small pot of wax out of 2 parts tallow and 1 part beeswax. 

The result was beautifully successful!  My process was a bit rushed, and the two candles I did came out lumpy and crooked, but burned wonderfully.  The result was strong enough to treat as normal candles, and they didn’t drip.  The flame was bright–not too tall and not too dim, with only a very small amount of “bloom” forming on the end of the wick after almost 2 hours of burning. 

I’ll do a larger production later this spring and see if I can keep up with this home’s need of about 4 candles/month. 

I love it when things work out! 

Continue reading

Posted in Home products | Comments Off on Grass fed candles