A Difficult Swarm

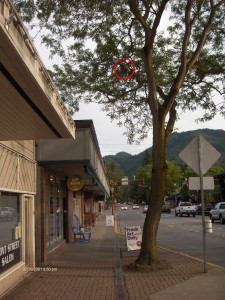
This swarm is on crossed branches 20 ft. above a busy sidewalk in Issaquah, WA.

Yesterday was beautiful, and my cubicle job gave me a rare chance to spend the afternoon outside visiting a cell site.

I got the swarm call just as I was finishing up for the day. There was a swarm of bees hanging in a tree over Front St. in downtown Issaquah. I suspected it might be a little tricky when Monica, who works at the art gallery next to the tree told me: “Oh yeah, you’ll need a ladder.”

After stopping at home for some supplies and dinner (It’s good Kathy feeds me when I’m thinking about other things–smart woman!), I left for Issaquah with my two girls (age 3 & 9) to see what the swarm was like.

The bees had chosen a branch on a tall black locust tree 20 feet above a busy sidewalk in downtown Issaquah.  Hmmmm…..  I spoke with one of the shops for the building owner’s phone number, and I left a message asking permission for me to go up on the roof.  Somehow, in spite of Monica’s warning, I had left the ladder at home.  The missing ladder sealed it–I decided it would be too difficult and returned home; but still wondered if  I could reach the swarm the nearby roof.

The owner did give me the okay to go on the roof, and I returned later in the evening as the sun was going down with a large insect net on the end of a long pole. I’m glad I set up a bunch of orange warning cones on the sidewalk below, because only a portion of the bees went into the net. The rest went *splat* on the sidewalk, and I spent the next hour coaxing the remaining bees into my swarm catching box while talking with the bartender from across the street who came out to see my project.

I’m counting this collection in the success column, although I’ll have second thoughts about proceeding next time the swarm is in a busy public location. I’m glad it wasn’t rush hour!

Posted in Beekeeping | Tagged , | Comments Off on A Difficult Swarm

The calf has arrived!

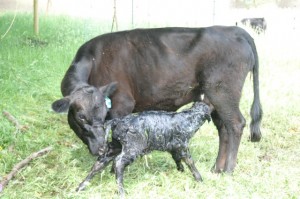
This minutes old calf is still wet from being born

Maureen, our Dexter cow, gave us a calf last Thursday morning.

We didn’t know her exact due date–only that it would be “sometime in June”.  Kathy had been watching for signs and mentioned to me the day before that we should check her more often so as not to miss the event.

Well….Thursday morning was a bit busy.  At about 9:30, I was finishing the last of my morning chores which happened to be out near Maureen.  I was in the sun, and she was in the shade, so I had to blink a couple times to figure out what I was looking at.  Her newborn bull calf was already nursing. 

…sorry Kathy, she was too fast for us!

Posted in Cows, Farming | Tagged , , , | Comments Off on The calf has arrived!

A successful honey bee swarm cut-out

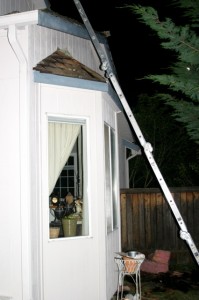
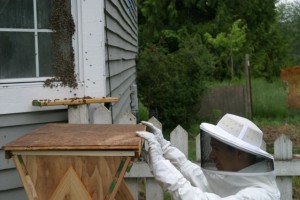
I removed almost all the shingles from above this window to reach the swarm

On Wednesday afternoon last week, I received a call from a landlord in Maple Valley who had a swarm of honey bees in the wall of his rental house.  I told him that yes, this is something I’m interested in, and no, I don’t charge to remove honey bees.

After a quick stop at home for some tools & a bit of dinner, I pulled into the cul-de-sac of beautifully manicured lawns at about 6:30 PM.  The owner, Mark, was outside to meet me, as were the tenants, Preston, Betsy and their teenage son.   Although the swarm was on the opposite side of the house, they quickly invited me inside to avoid the bees. 

Betsy & her son had seen the swarm hanging from a backyard cedar tree branch around noon, and had watched from the house as the bees left the tree and entered the little roof above the window nook.  This was when they called Mark for help. 

I looked at the place where the bees had swarmed into, to see if there was a way to do a trap-out or otherwise remove them without tearing into the house.  They have entered this little covered space through spaces between the wood shingles and the wall.  The roof was tight against rain, but the bees could still find gaps large enough to crawl into.  Setting a trap to exclude the bees was not going to work in this case because there were just too many holes.  There were probably 20 places they could get through, and most of them well hidden.

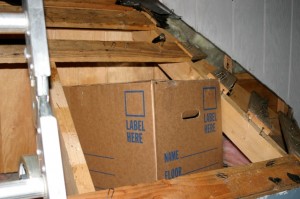
A cardboard box works great to hold the bees.

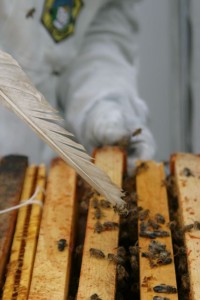
The house was about 20 years old, and Mark said it would be okay for me to pull off the brittle shingles from small roof over the window.  You know, I’m pretty good at destructive projects, even when wearing a bee-suit.  After about 30 minutes of work, the cluster of bees was exposed enough for me to slide in a cardboard box to catch it.  Two swipes of my goose feather bee brush separated the ball of bees from the wooden eaves, and the bees dropped neatly into the box.  I closed up the box, but left the two hand-holds open so the flying bees would be able to join their sisters, which they started doing almost immediately.  I left the bees for a couple hours, and brought them home after dark.  There was not one left behind. 

Mark commented this was a win-win situation.  I made a huge mess in the owner’s yard, didn’t have to clean up a thing, and he was glad for me to do it.

Here’s a job I like!

Posted in Beekeeping | Tagged , | Comments Off on A successful honey bee swarm cut-out

Shifting my Beehive from Langstroth Frames to Top Bar Hive

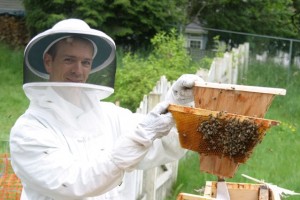
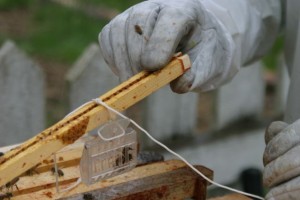
Make sure you know where the queen ends up–I used a “hair clip queen catcher”

Motivation:
I moved a 5 frame conventional (Langstroth) nucleus hive into a top bar hive so they would have space to grow.  The bottom corners of each frame are cut off to make the rectangular frame fit into the trapezoid shape of the top bar hive.  Since I’m running only top bar hives now, it makes sense for me to have a consistent setup.

There are several approaches:
     1. Use the top of the old frame as the new top bar;
     2. Use cotton string to tie all the comb onto a new top bar; or
     3. Use screws to attach the old frame to the bottom of a new top bar. 
I chose to use the first approach because it is a faster process, and it keeps the maximum amount of comb intact.

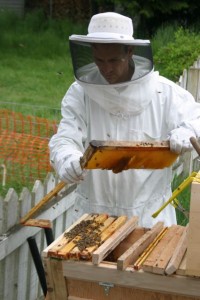
All frames from the “old hive” should be in the same sequence in the new hive

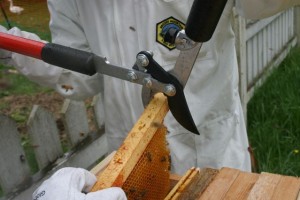
Loping Shears are helpful when cutting off the old frames

Step 1: Find & capture the queen.

  • In all the disruption that this causes, I wanted to prevent something bad from happening to the queen.

Step 2: Shake off the bees from the frame and remove the bottom 3 edges of the frame.

  • Shake the bees into the new top bar hive.
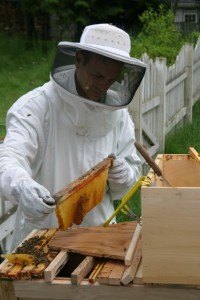
  • A goose feather makes a good “bee brush” to flick them off of the frame.
  • Cut through any wax that attaches the comb to the sides or bottom of the frame.
  • Make a single cut with a pair of loping shears on the bottom or sides of the original frame.
  • Break off the wood pieces from the sides & bottom.
  • I had to cut off the ends of the frame (19″ long) to fit into the place held by 18″ top bars.

Cut w/loping shears then break off the frame edge

Step 3: Use follower as template to cut off excess comb.

  • The follower is a movable board that makes a false rear wall at the back of the top bar hive. 
  • It allows the TBH beekeeper to adjust how much space the bees have to work with
  • It is exactly the right shape of the final comb profile.

Lay “frameless” frame over follower to use as a template

The remaining comb is now the right shape to fit

Step 4: Place the frames into the new top bar hive.

  • Because spacers on each frame have been removed, you will need to pay more attention to bee space.
  • Use a water mist spray to drive the bees off of the top bar when replacing the cover.
  • The old frames are not as wide as the top bars, and can slide together.  This gives good ventilation (good), but will make sealing the hive to transport difficult (bad), and allow zero bee-spacing (also bad).

Be careful to leave the correct bee-space

Step 5: Keep the queen caged until the bees move into their new home.

  • I hung the hair clip queen catcher from a string between two combs (preferably not brood combs) in order to help coax the workers into the new hive.
  • I released the queen that evening, after all the bees had moved in.
I left the queen in the cage for the first day, then released her.

Step 6: The bees will search around for their new home & eventually move in.

  • Place the new hive as close as possible to the old location.

Foragers are clustering on and trying to enter the (now closed) bathroom window

Step 7: Observe & adjust as needed

  • When the bees start adding comb, make sure it is parallel to the last frame, and centered on the next top bar.
  • Grooves on the bottom of each top bar help the bees keep the comb straight & centered.

Other resources:
video demonstration at http://vimeo.com/5614348

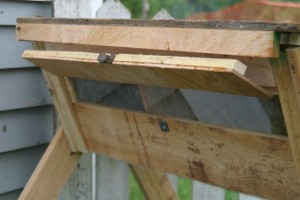
The observation window on the hive helps me to monitor progress

Posted in Beekeeping, Farming, Top Bar Hives | Tagged , | Comments Off on Shifting my Beehive from Langstroth Frames to Top Bar Hive

Permaculture & Christianity, part 3 – “Native vs. Exotic Plants”

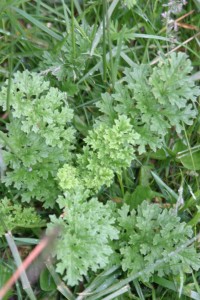
Tansy Ragwort is poisonous to most ruminant animals

My permaculture class had a great discussion over the weekend about exotic, invasive plants.  These noxious weeds are thriving in the conditions where they are most needed.  The conditions where they grow are the very places where the land has been disturbed.  They are the ones working hardest to heal the land, and are building the soil up to support the next stage of species progression.

I illustrated the class discussion with how burdock is breaking up the compacted clay soil around my driveway, and how scotch broom is adding nitrogen to some of my worst areas of sterile fill dirt.  Others pointed out beetles are attacking mature Grand Fir trees but ignoring the young trees, as nature’s way of saying the soil & forest needed the decaying wood it was deprived of from successive lumber harvests.  English ivy is a problem because it pulls down trees, but by doing so, it destroys it’s own shady habitat so another species can progress.

It was a good discussion and it got everyone thinking about invasive plants in a new level of awareness.  There were also thoughts about how to include these hard working plants into permaculture holistic designs.  The solution to the “problem” of invasive plants is not to eliminate the plants, but rather change the conditions that favor them.

On my way home I made a connection between the concept of conditions & processes with Christianity.  The condition is man’s separation from God, and it results in a destructive cluelessness for everyone affected.   Since we don’t know how things in life work together, we aren’t able to make things work–remember the saying that life doesn’t come with a users’ manual?  We wear down our bodies with poor diet, lack of sleep, and destructive behavior.  If that isn’t bad enough, we share our poor performance with those around us and end up with flawed relationships.   There is a technical term for this process: “sin”.   I am thoroughly convinced that the logic of Romans 6:23 is biconditional: 1. Sin brings Death.  2. Death indicates Sin.  If something you are doing is destructive, then it is sinful.

Let me illustrate my point this way:  This past week has been a very busy one for me and I’ve cut back on my sleep hours in order to get other work done.  Sleeping 5 hours/night will eventually rob my health and kill me.  So why do I do it?  Because my situation makes this destructive behavior flourish.  I’m a slave to my sinful condition.  Not getting enough sleep shows that I am sinful.

The question is now: “How do we get rid of noxious weeds and invasive, exotic plants”?  My answer to this is to listen to what the plants tell you, and you put things where they go.  Ivy says the ground needs sunshine & organic matter.  Scotch broom says the soil needs a source of nitrogen.  Tansy ragwort screams out “don’t graze me” because it comes when the pasture is being managed wrong.   Use appropriate tools to help these deficiencies.

The real question is now: “How do we get rid of noxious sin, and invasive, exotic death?”  Failing health says everyone will eventually die–everyone is mired in sin.  My failures tell a lot about me.  Use Gods appropriate solutions to fix the condition and get free from the cause of death.

Permaculture Design Principles:
1. Save the People
2. Save the Planet
3. Recycle the Surplus

God is the ultimate “permaculturist”.  He was using the permaculture design principles before Bill Mollison ever wrote them down.

Permaculture is all about original sin.

Posted in Christian Permaculture, Farming, Soil | Tagged , , , | Comments Off on Permaculture & Christianity, part 3 – “Native vs. Exotic Plants”

Cool weather continues

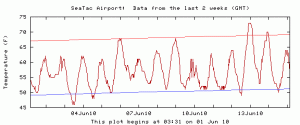
Still below 75°F/24°C in Seattle (plot from Cliff Mass' weather blog)

Today is June 15th, and Seattle has yet to break past 75° F/24° C this year.  This means it’s been a great spring for growing grass, but the rainy weather has taken a toll on my apiary. 

March this year was warm & abundant, and my hive from last year emerged from winter and just boomed with a major flowering from the big leaf maple trees.   The bee population was increasing so fast during March’s sunny weather that I was worried about them swarming.  So I split them.  Half went with the old queen in the old hive, and the rest were split equally into 3 “nucleus” hives, and made new queens.   Things were easy, life was good, spring was warm, and the new queens emerged, mated and started laying.  I transferred one nucleus hive into a 3 ft. Top Bar Hive and moved it over to a friend’s house in Bellevue.    

…And rainy weather returned.  

Spring farming season kicked in, and I stopped monitoring the hives as much as they needed.  About 2 weeks ago, I saw drones being expelled from the original hive.  This means that they were running out of food, so I put in about a pound of crystallized honey.  The bees cleaned it up in a couple days, and a couple of warm days made me relax a bit.  Last week I did another walk through of the hives, and found a layer of lethargic bees on the entrance of that same hive.  I put in another pound of honey, but this time it was too late to do any good, and the hive did not recover. 

To make matters worse, we let the cows graze the pasture where the bee hives were placed, and one of them bumped the cover of the nucleus hives some.  This exposed two frames to the rain, and it also effectively removed the partition between the two hives under that single cover.  The bees on the wet side wisely decided to move in with the bees on the dry side.  Result: my two nucleus hives merged into a single but larger group of bees, and one of the two young queens died. 

The silver lining here appeared on Friday, when I transferred the one remaining nucleus hive into it’s own top bar hive.  It had a good population of bees–enough to keep it viable.  I now have no more conventionally configured Langstroth hives–all 3 remaining hives are in top bar boxes.   Although there is still the occasional rain shower, the days are not the continuous Seattle drizzle that killed my other hive.  I’ll keep a close eye on them for the next week or so, and feed them if they need it.  Summer will come soon, and hopefully they will increase enough in July & August to be strong enough to prepare for winter.

Posted in Beekeeping | Tagged | Comments Off on Cool weather continues

Geese mow my lawn

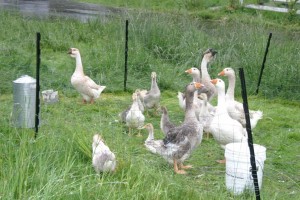
2 months and counting with no feed bill!

It has now been 7 weeks since my goslings hatched, and they are about half-way feathered out.  The young ones are growing quickly and weight about 4 lbs each.  It’s been cold and rainy since they hatched, but their parents have done excellent work keeping them protected–I’ve certainly given them no shelter. 

 
For the past 5 weeks, I’ve had all goslings & parents together in one flock, and I’ve been moving them to new grass every day.  Right after I finish my breakfast, I head outside and move their pen.  This is a big efficiency improvement over visiting each adult pair in their own nesting pen.  The babies are much bigger now and you can tell they love to eat!  The wire fence I move around gives them about 300 square feet of space, and by the next day they have mown all of the tender grass down to an inch or two of the ground.   
 
The part I love best is that all I give them is fresh grass, water, and a bit of grit.  I do a bit of work to move the pen, and they harvest their own feed.  The grass is truly lush this time of year, and it’s been exciting to see how much good it is for these birds–they are in beautiful condition!  In previous years, I’ve given the goslings about half of their diet in grain because I was working out a grazing management routine that worked.   The key so far, has been keeping them concentrated in small areas and giving them fresh grass every day.
 
Using step-in posts to support a lightweight wire fence has given me tremendous flexibility–I’ve used this flock on my lawn, and they do a great job.  Yes, they leave behind the grass as tubular mulch, but manure is a grass farmer’s asset!  It helps that there is so much rain here in Seattle that the manure washes down into the grass after about 3 days, plus the grass comes back twice as quickly because of the fertilization!
 
A problem I’ve experience several times before with grain feeding goslings, is related to how fast they put weight on.  They grow so fast that their legs can’t keep up with their stomachs, and they have had trouble walking.  Using only grass has probably slowed them down a little, but the trade off’s of improved health and zero feed costs are exchanges I’d make any day!    This is no-input mob-grazing with geese.
 
 
Posted in Farming, Geese, Grazing, Pastured Poultry | Tagged , , | Comments Off on Geese mow my lawn

Got thin eggshells?

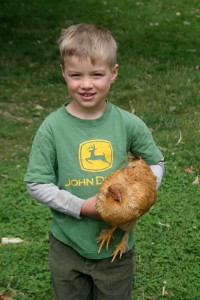
Joel has been our chicken farmer
In my experience, an egg with a thin shell is a problem that can be easily corrected.  In order to put a shell on its egg, the chicken mainly uses calcium, phosphorus & vitamin D.  If any one of these factors is missing, the bird will not be able to create a healthy shell.

Eggs with thin shells, weak shell, and even NO shells comes up as a topic every once in a while at our place.  It happens to a couple birds in our flock a few times each year–encouraging me to keep up my discipline in my farm management routines. Continue reading

Posted in Chickens, Ducks, Eggs, Farming, Fluoride info, Geese, Pastured Poultry | Tagged , , | Comments Off on Got thin eggshells?

Free to a good home: Blue Orchard Mason Bees

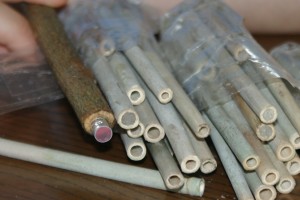
Mason bees prefer pencil-sized holes

In March, I was inspired to raise blue orchard mason bees (Osmia lignaria) after a presentation by Dave Hunter of http://huntersmasonbees.com

The story Dave shared at my beekeepers’ club meeting about how he got started really caught my attention.  He explained how he had bought a couple of tubes of mason bees and put them out as he ought to–in early spring, in a sunny part of his yard, along with some empty tubes for the emerging bees to nest in.  In June, He was happy to see many of those tubes had been filled with mason bee larvae.  For whatever reason though, the tubes he bought never hatched out!  Since mason bees are a native insect here in the Pacific NW, you can “grow your own” just by providing suitable homes.   It will take a couple years to build up your local population this way, but you don’t need to purchase your initial “start”. 

The orchard mason bee is slightly smaller than a honey bee,shiny, and dark blue in color. Males are smaller than females, have longer antennae and have an additional tuft of light-colored hairs on the face. Females have hairs on the underside of the abdomen adapted for carrying pollen.

http://king.wsu.edu/foodandfarms/documents/masonbee.pdf

The bees prefer homes about the diameter of a pencil, about 6 inches deep, which are closed on one end.  These can be made by rolling paper around a pencil and securing the edge with glue.  Dave buys his tubes by the ten-thousand from a paper products company in Wisconsin.  Of course that’s a bit more than I need.  There are others out there who use bamboo, and nesting blocks of wood or plastic. 

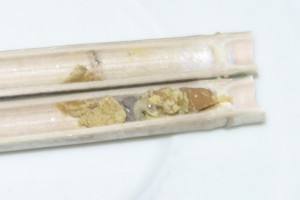
A lump of pollen, a tiny larva, and a mud separation

Our friend, Kathleen, was more than happy to have me haul away some of the bamboo trimmings she had thinned out from the around her house.  I can tell you that I can trim bamboo sticks much faster than I can roll paper around a pencil–so that is the method I used.   The hollow portion of this bamboo wasn’t quite as fat as a pencil, but I still went with it.  I put a few dozen tubes out at different around the house where they would get some sun and stay dry.  The places which worked were the ones which had the most sun.  I had volunteer mason bees fill up 5 of the bamboo tubes. 

There is still a couple weeks left in the season for mason bees, but I brought in mine on the early side to avoid losing them to another predator–the parasitic wasps start flying in mid-June.  They lay eggs in the end of the mason bee nest and their larvae will eat all the mason bees developing in the length of the tube.  They are another beneficial insect, but I’d rather keep my mason bee collection safe.  

Pollen mites are another menace.  These are not parasitic mites, but they can eat the lump of food meant for the baby mason bee.  In springtime, these mites will cling on the emerging bees to the point where it is too heavy to fly.  There are two solutions to avoid pollen mites.  One is to use new tubes every year.  Another is to send the mason bee tubes to Bakersfield, CA where there are no pollen mites (too hot & dry).  Since I don’t know anyone in Bakersfield, I’m going to put my 5 precious tubes in the attic for the duration of the summer.  (That’s another one of Dave’s hints) 

In September these larva will be fully developed bees, just waiting for springtime.  That’s when I’ll transfer them to the refrigerator, or maybe to a safe place outside until it’s time for them to come out in March or April.

Posted in Beekeeping, Farming | Tagged , , | Comments Off on Free to a good home: Blue Orchard Mason Bees

Our milking routine

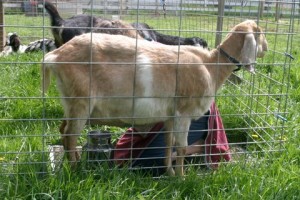
Buttercup’s collar is clipped to the pen

Here is a quick roundup of how our milking routine works.  Kathy has gone through several different routines, and this one is working well for us.

Since our goats are enclosed in portable pens, we actually go out to the pen to milk instead of moving the goat.  The ground is often bumpy, so we use a 2 ft x 4 ft piece of expanded metal as the “stand”.  This gives a nice flat area to work on, and is a great help in preventing the milk bucket from tipping over.  
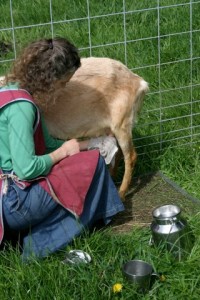
Udder wash w/warm water

Each goat has a collar which we clip directly to the wall of the pen keeping them in one place during the milking.  Depending on weather and other factors, this may be a good time to brush off the coat of the milker and knock off any loose hair or hay stubble before you start.

First, we wash off the udder with warm, almost hot water.  Since we only have a few goats to milk, it works to take a small container of hot water out to the pen with us–it stays warm long enough to last through all the goats.  Each doe gets a clean washcloth, and the cloth should not got back into the water a 2nd time.
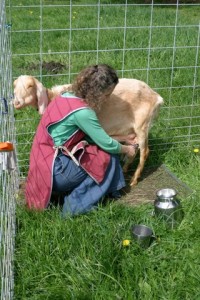
3 squirts into strip cup

The first milk that comes out of the teat has the highest concentration of bacteria in it.  These aren’t necessarily pathogenic bacteria, but they will cause the milk to sour more quickly, or give it a stronger flavor.  By sending the first few squirts into a strip cup, it helps to flush these out of the milk pathway.  The top of the strip cup is covered with a fine mesh.  If the milk does not pass cleanly through the mesh, there is a problem with the goat–indicating a need for further mastitis or health checks.

Now that the udder is clean and the first milk has been cleared out, it’s time to collect the milk.  We have a filter that fits neatly onto the top of our milking pail–it’s really a stainless funnel with a screw on ring.  it has a special fiber filter that is held in place by the ring.  (It’s called a stainless steel mini-strainer)  This keeps any surprise objects out – often a couple hairs of blades of grass will try to jump in.  A goat can produce anywhere from 2 cups to  2 quarts per milking.  We’ve found that 1 quart per day is the normal production for our grass & browse fed nubians. 
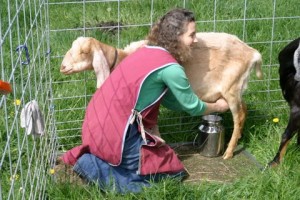
Milking into pail (handle is forward)

Sometimes the goat will “dance” as you milk her.  There are many reasons why this may happen, and you will want to pay attention to see why.  It may be that she is in pain because of a problem, or she doesn’t want you to finish her off before her goat kids get their share, or she is just impatient to move on.  Prevent “bucket failure” by the pail handle away from the goat’s dancing rear feet.  Sometimes I’ll hold the pail in one hand and milk with the other as we discuss which of us is the more stubborn. 
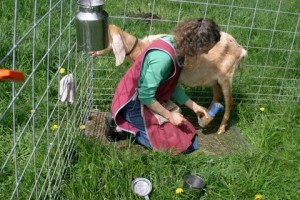
Teat dip with iodine solution

Last is the teat dip.  Milking is a process that stretches out the teat’s orifices, and can leave the opportunity for bacteria to enter and infect the udder.  We do an iodine based teat dip at the very end to help prevent hitting problems the next day.  This goes into a special squeeze bottle that is made for this job. 
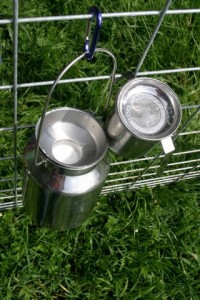
Milk pail & strip cup

Most of our milking equipment we bought from Hoeggers’ Goat Supply.  They can be found online at http://hoeggergoatsupply.com/

The 4 & 6 quart stainless steel milk totes are about the right size to fit under our goats.  The “stainless steel mini strainer” fits into the top of the tote after you cut off the bottom of the strainer’s handle with a hack saw.

A 100-count box of 6-1/2″ round filters cut into quarters will give you filters for 400 milkings.

Posted in Dairy, Farming, Goats | Tagged , , | Comments Off on Our milking routine